Welcome to this comprehensive step-by-step guide on how to crochet a top! Whether you’re a crochet novice looking to dip your toes into the world of wearable crafts or an experienced yarn artist eager to expand your repertoire, this tutorial is designed for you. We’ll guide you through each stage of the process, from making your initial slipknot to adding the final touches like ruching and adjustable straps.
Table of Contents
- 1 Recommended Materials
- 2 Abbreviations
- 3 Crochet Top Measurement Instructions
- 4 Make a Crochet Top Step-by-Step
- 4.1 Creating the Top Part of The Crochet Top
- 4.1.1 Step 1: Establishing Your Foundation Chain
- 4.1.2 Step 2: Initiating the First Row with Half Double Crochet
- 4.1.3 Step 3: Completing the First Row
- 4.1.4 Step 4: Building Up Your Rows
- 4.1.5 Step 5: Adding a Splash of Color with Top Trim
- 4.1.6 Step 6: Beautifying the Bottom with a Trim
- 4.1.7 Step 7: Finishing the Bottom Edge with a Single Crochet Trim
- 4.1.8 Step 8: Crafting a Versatile Length Chain for Easy Wearing
- 4.1.9 Fitting Test: Ensuring the Perfect Fit
- 4.1.10 Adjustability Note: Don’t Stress About the Fit!
- 4.1.11 Final Step: Securing Your Work and Celebrating Your Craftsmanship
- 4.2 Creating The Bottom of The Crochet Top
- 4.2.1 Step 9: Initiating the Bottom Edge with a Chain-4 Foundation
- 4.2.2 Step 10: Crafting the First Treble Crochet Stitches
- 4.2.3 Step 11: Adding Volume with Double Treble Crochets in a Single Stitch
- 4.2.4 Step 12: Completing the First Row of Your Trim
- 4.2.5 Step 13: Building and Refining Additional Rows
- 4.3 Crochet Top: Creating the Ruching
- 4.4 Crochet Top: Creating the Strap
- 4.5 Attaching the Strap to The Back of Your Top
- 4.1 Creating the Top Part of The Crochet Top
- 5 How to Crochet a Top Full Video Tutorial
Recommended Materials
- 5 mm crochet hook (crochet hook size guide)
- 2 colors of weight 4 yarn
- Scissors
- Measuring tape
- Tapestry needle
- Stitch markers
Abbreviations
- CH: Chain
- SC: Single crochet
- HDC: Half double crochet
- TR: Treble crochet
- SL ST: Slip stitch
Versatility at Your Fingertips
One of the most exciting aspects of this guide is its versatility. While the focus is on creating a stunning crochet top, the skills and techniques you’ll learn here can easily be adapted to craft a wide array of crochet tops. The design possibilities are virtually limitless—change the yarn color, alter the stitch patterns, or add embellishments like beads or tassels to make each creation uniquely yours.
Further Reading
If you find yourself captivated by the world of crochet tops, be sure to check out our other articles featuring an array of crochet top patterns. These articles dive deep into various styles, stitches, and techniques, offering a well-rounded understanding of how to bring your crochet top visions to life.
Crochet Top Patterns
- 27 Free Crochet Top Patterns
- 21 Stylish Free Crochet Crop Top Patterns
- 15 Free Crochet Halter Top Patterns
- 23 Free Crochet Cardigan Patterns
- How to Crochet a Tube Top
Crochet Top Measurement Instructions
The pattern for this top has no set measurements. It can be easily customized and changed to fit a wide range of sizes. I will give examples using my measurements, but you will follow the same steps as I do with a smaller or larger number of stitches to create your size. When comparing your chains to your measuring tape, ensure that your chain is pulled tight to ensure accurate sizing.
1st Measurement
To start, you will take a few measurements using your tape measure. You are going to take a measurement from the part of your shoulder blade on your back closest to your arm to the other side of your shoulder blade, measuring across the largest part of your chest. This will be the length of your top.
You did not measure all the way around, as the top has an open back with adjustable ties, which we will add later. This gap on your back provides room for the top to stretch in order to ensure a correct fit once you adjust the ties to your liking. My measurement is 34 inches.
2nd Measurement
For your second measurement, you are going to measure your chest from top to bottom, again making sure you measure over the largest part of your chest. I measured a couple of inches below my collarbone to just underneath my bust. This will be the width of your top. My measurement is 11 inches.
3rd Measurement
For your third measurement, you will measure from the bottom of your last measurement to the end of where you want your top to fall on your body. I measured from the bottom of my bust to my hips, which is 12 inches.
Using the first 2 measurements, you will create a rectangle for the top part of this top. The measurement across your chest and part of your back will be the length of the top, and the measurement from the top to the bottom of your chest will be the width of the top.
For example, my length measurement is 34 inches, and my width measurement is 11 inches, which means my finished rectangle should be 34 inches from left to right and 11 inches from top to bottom.
Make a Crochet Top Step-by-Step
Creating the Top Part of The Crochet Top
Step 1: Establishing Your Foundation Chain
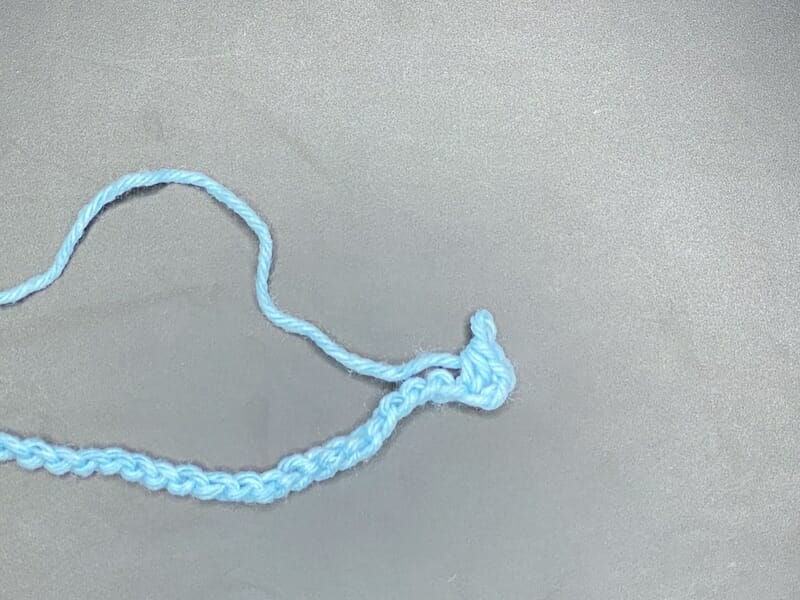
Create a slipknot and chain until you reach the length of your first measurement.
Chain by yarning over and pulling through the loop currently on your hook until you reach the length of the first measurement you took. I chained until I reached a 34-inch length. Make sure you pull your chain tight when measuring your length against your tape measure.

Step 2: Initiating the First Row with Half Double Crochet
Chain 2 and half double crochet into the third loop from hook (CH 2 and HDC in 3rd loop from hook).
Add 2 chains to your current chain by yarning over and pulling through the loop currently on your hook twice, then half double crochet into the third loop from your hook by yarning over, inserting your hook into the chain, yarning over, and then pulling through all 3 loops on your hook.
Step 3: Completing the First Row
Half double crochet across the rest of the chains you made (HDC across).
Half double crochet into each chain that you made by yarning over, inserting your hook into the chain, yarning over, and then pulling through all 3 loops on your hook. Repeat this across the entire chain.

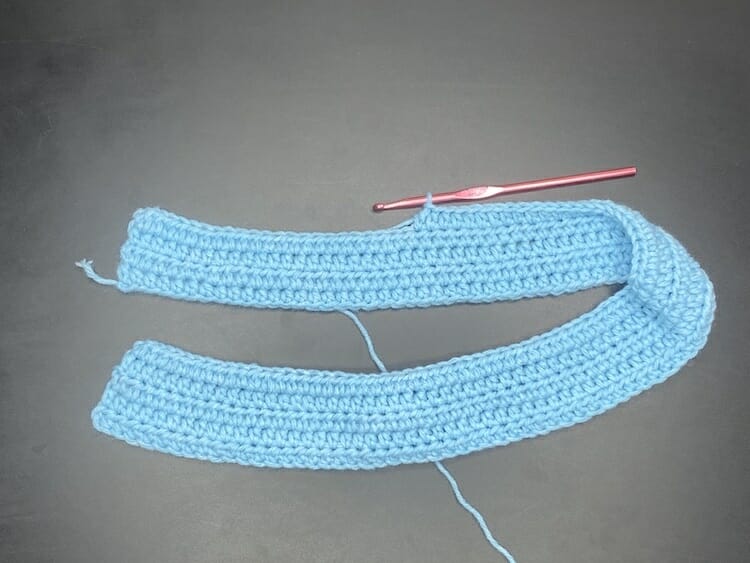
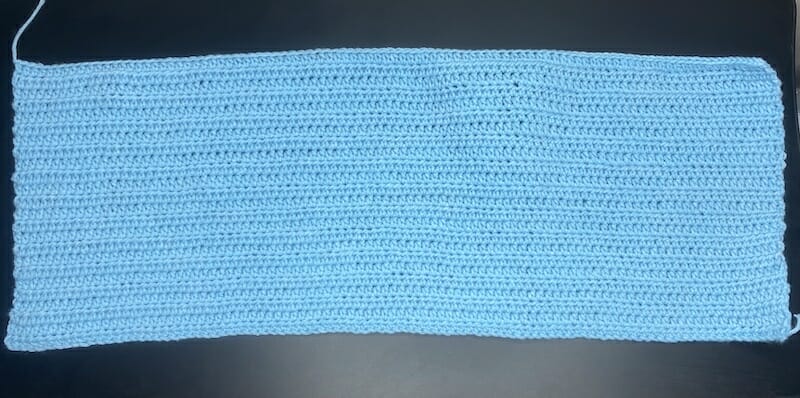
Step 4: Building Up Your Rows
You are going to repeat the steps of chaining 2 at the end of a row in order to create height for your next row to start and half double crocheting across the row until your rectangle is the width of the second measurement you took. I will be crocheting until my rectangle is 11 inches wide.
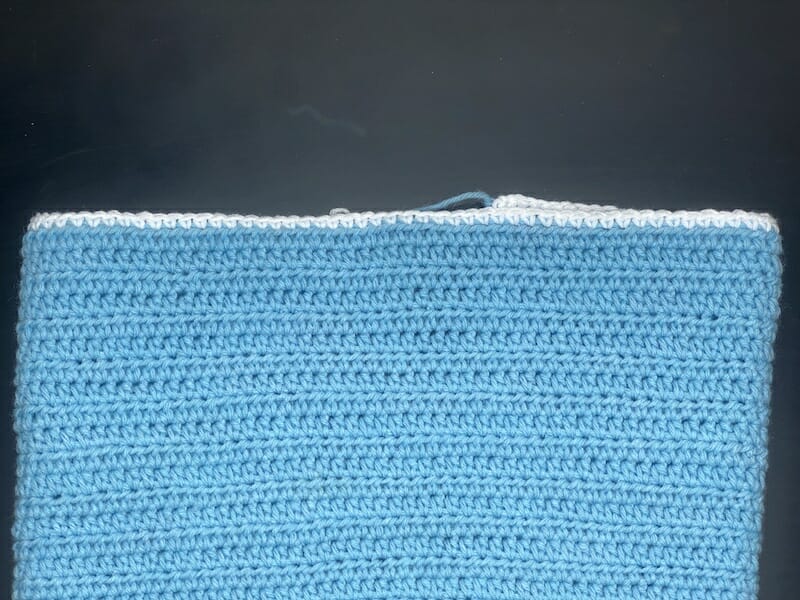
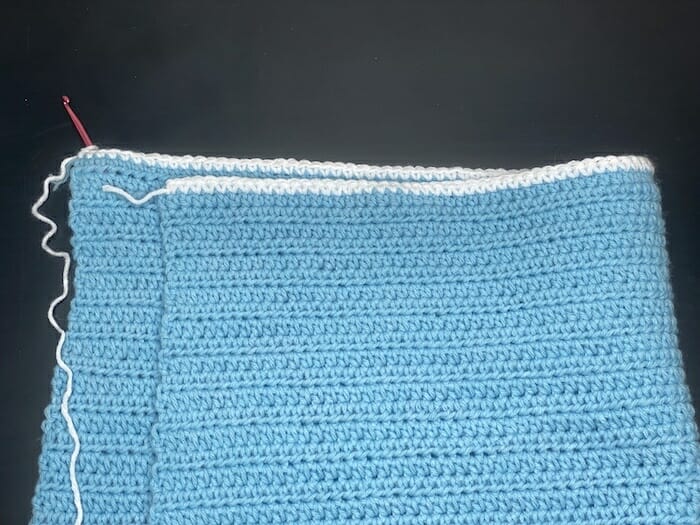
Step 5: Adding a Splash of Color with Top Trim
Once your rectangle is your desired length and width, fasten off your yarn and create a slipknot with your other colored yarn to single crochet along the top.
Step 6: Beautifying the Bottom with a Trim
Create a slipknot and attach your yarn into the first stitch of the top of your rectangle. Single crochet along the top of your rectangle until you reach the last stitch on the other side. Fasten off your yarn.
Single crochet across the top of your rectangle by inserting your hook into the stitch, yarning over, and then pulling through both loops on your hook.
Step 7: Finishing the Bottom Edge with a Single Crochet Trim
Create a slipknot and attach your yarn into the first stitch on the bottom of your rectangle. Single crochet along the bottom until you reach the last stitch. Do not fasten off your yarn.
Single crochet across the bottom of your rectangle by inserting your hook into the stitch, yarning over, and then pulling through both loops on your hook
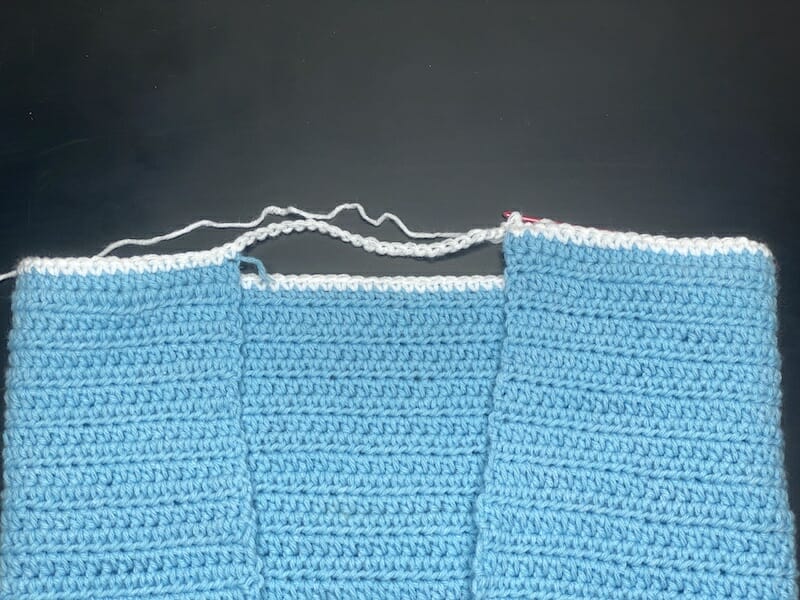
Step 8: Crafting a Versatile Length Chain for Easy Wearing
Chain until you reach a length that allows for comfortable wear, either pulled over your head or up from your legs. Read further before fastening off your yarn.
Create a chain by yarning over and then pulling through the loop that is currently on your hook, and repeat this until you have a long enough chain that you are able to comfortably put the top on over your head and shoulders or up from your legs, whichever way is easiest for you.
Fitting Test: Ensuring the Perfect Fit
Use a stitch marker to temporarily attach the chain to the corner of the rectangle where your trim started, and try on the top for size. Adjust the chain length as needed.
Adjustability Note: Don’t Stress About the Fit!
If the top feels too loose, don’t worry. An adjustable strap will be added later to ensure a perfect fit.
Final Step: Securing Your Work and Celebrating Your Craftsmanship
Once the chain length is just right and the top fits well, slip stitch to secure everything in place and fasten off your yarn.
Creating The Bottom of The Crochet Top
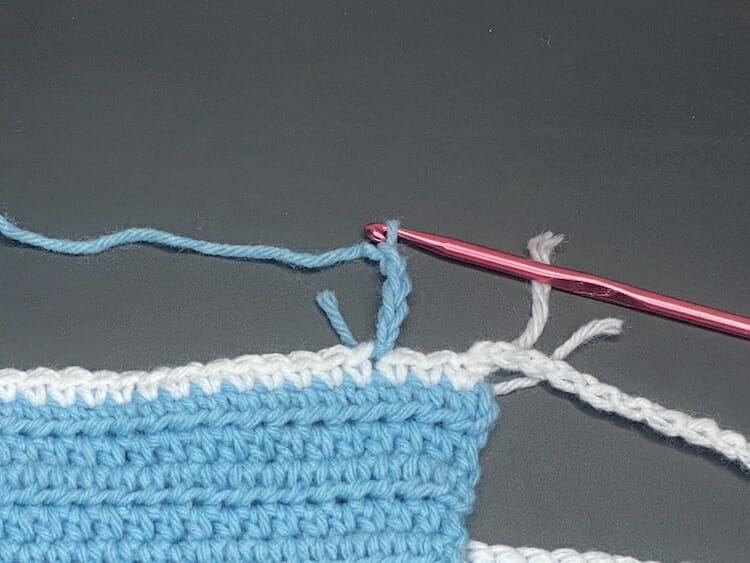
Step 9: Initiating the Bottom Edge with a Chain-4 Foundation
Create a slipknot and insert your first yarn color into the first stitch on the bottom of your rectangle.
Chain 4 (CG 4)
Chain 4 by yarning over and pulling through the loop on your hook 4 times
Step 10: Crafting the First Treble Crochet Stitches
Perform a treble crochet for the next two stitches to set the base for your decorative trim.
Treble crochet on the single crochet trim that you created for 2 stitches (TR)
Treble crochet by yarning over twice, inserting your hook into the stitch, pulling the yarn through the stitch, yarning over, pulling through the first 2 loops on your hook, yarning over and pulling through the next 2 loops loops on your hook, yarning over, and pulling through the last 2 loops on your hook. Repeat this for the next 2 stitches.
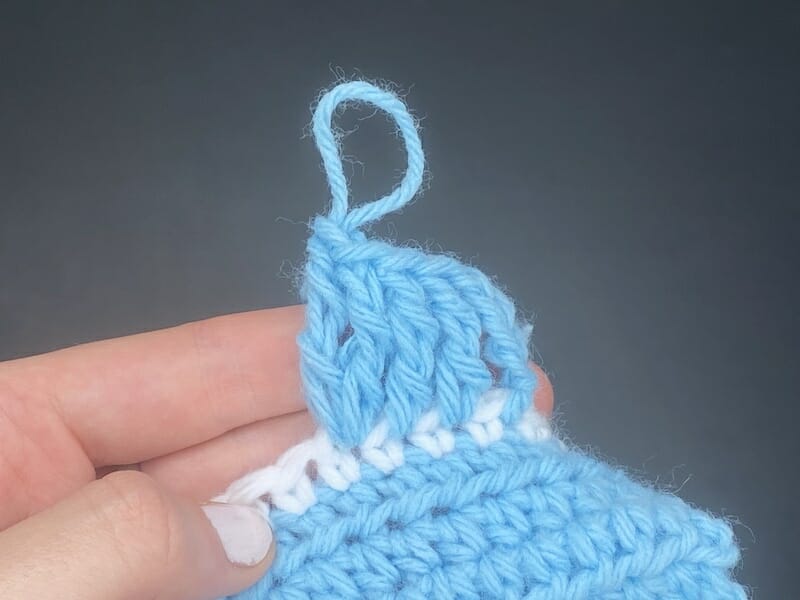
Step 11: Adding Volume with Double Treble Crochets in a Single Stitch
Create two treble crochets into one stitch to build volume and texture into your trim.
Put 2 treble crochets together in one stitch (2 TR in 1 stitch)
Treble crochet by yarning over twice, inserting your hook into the stitch, pulling the yarn through the stitch, yarning over, pulling through the first 2 loops on your hook, yarning over and pulling through the next 2 loops loops on your hook, yarning over, and pulling through the last 2 loops on your hook. Repeat this a second time into the same stitch that you put the previous treble crochet.
Step 12: Completing the First Row of Your Trim
Close out the first row by slip stitching into the top of your initial chain-4.
Repeat the pattern of treble crocheting 2 times, and then putting 2 treble crochets together in one stitch all the way around your single crochet trim and into the chain you have made.
To finish off the row, slip stitch into the top of the chain 4 that you made (SL ST into top of CH 4)
To slip stitch into the top the chain 4 you made, insert your hook into the stitch and pull yarn through the stitch and the loop on your hook.
Step 13: Building and Refining Additional Rows
Continue with the treble crochet pattern until you reach your desired trim length, periodically trying on your top for fit. Adjust by adding or removing rows as needed, then fasten off your yarn.
We are now going to repeat the same steps of chaining 4 to start off the row, treble crocheting into each stitch around the row, and then slip stitching into the top of the first treble crochet to end the row until you reach the length of the final measurement you took. You do not need to put 2 treble crochets together anymore, only one per stitch. I stopped adding rows once the treble crochet rows reached my measurement of 12 inches.
Try on your top before you fasten off your yarn. You can add or subtract rows now to your liking. Once you finish creating the amount of rows that you like, fasten off your yarn.

Crochet Top: Creating the Ruching
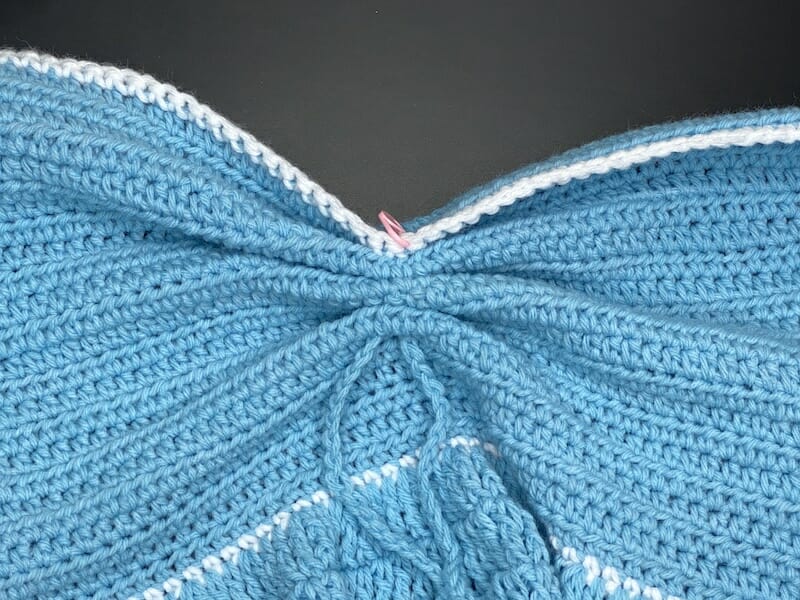
Step 14: Identifying the Center for Ruching
Lay your top flat on a surface. Find the middle of your rectangle top by dividing your initial measurement by 2. Since my measurement was 34 inches, the middle of my top is 17 inches. Mark the middle of your top with a stitch marker. Pinch the middle of your top to create the look of the ruching that you prefer.
Step 15: Creating an Extended Chain for Ruching
Chain until you have a length that is roughly 2 times the width of your top. You will have some excess to cut off and weave in at the end, but we create a longer chain to ensure you have enough chain to work with.
Chain by yarning over and pulling through the loop currently on your hook until you reach a length twice the width of your top.
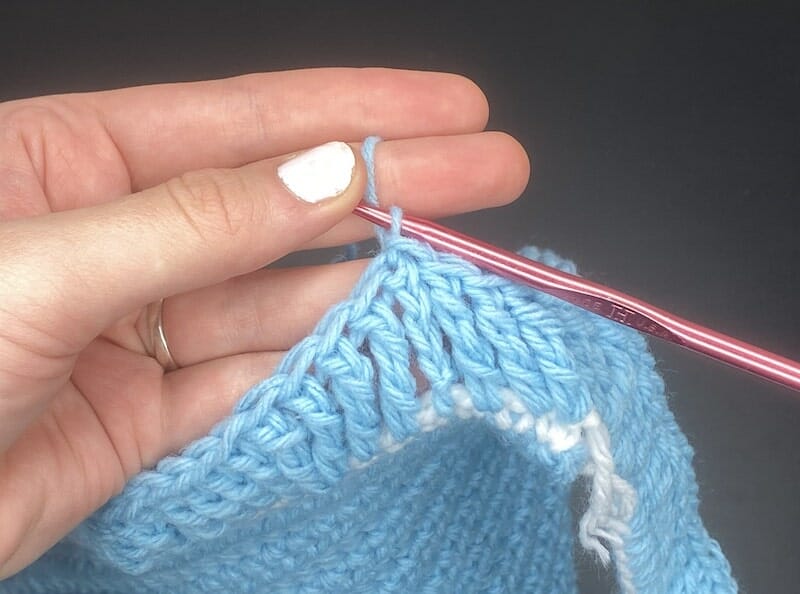
Step 16: Weaving and Ruching with Tapestry Needle
Using your tapestry needle, thread your chain through your needle. Starting at the bottom of your top, insert your needle through your top and begin to weave the chain you made up and under your half double crochet rows.
When your needle comes out of the top, weave the needle across to the right side of where you just weaved. Weave your needle and chain down your top, once again going through the half double crochet rows.
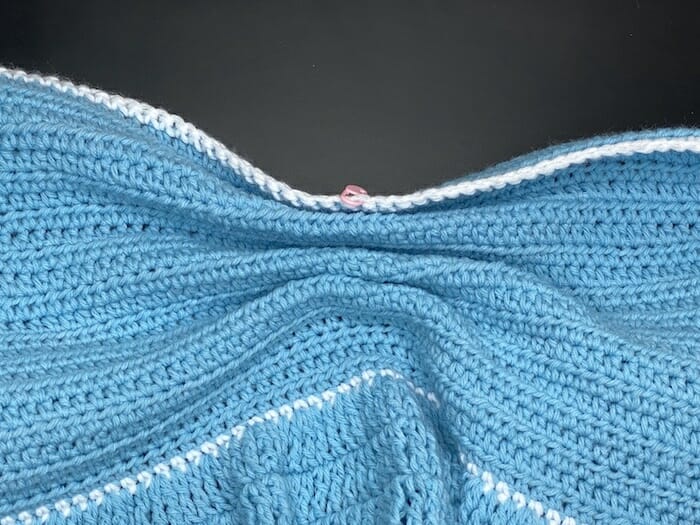
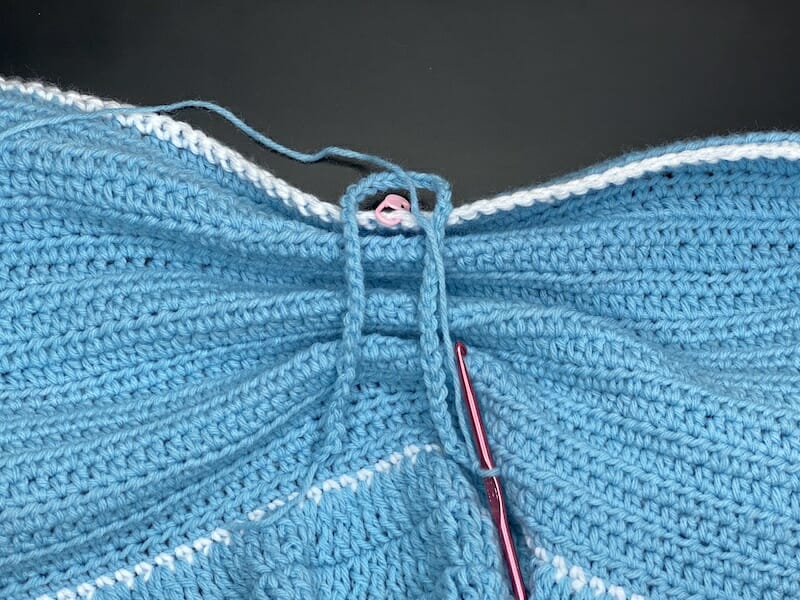
Once your needle comes out of the bottom of your top, pull tight on both ends of the chain that are sticking out to create a ruched effect. Tie these strings together once you are satisfied with your ruching.
Crochet Top: Creating the Strap
Step 17: Crafting the Adjustable Strap
Chain a long strap, around 150 chains for a general strap size. You may need to add or remove chains depending on your size. Lay the chain across the back of your top and cross the straps over one another to see the general length of chain that you need.
Chain by yarning over and pulling through the loop currently on your hook for around 150 times.
Attaching the Strap to The Back of Your Top
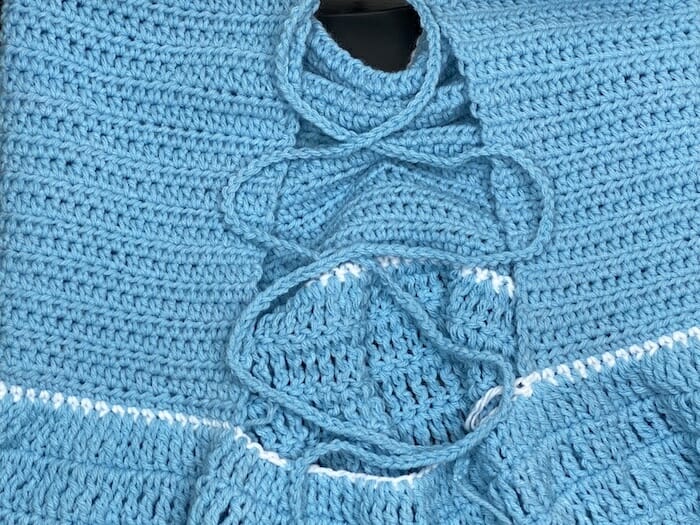
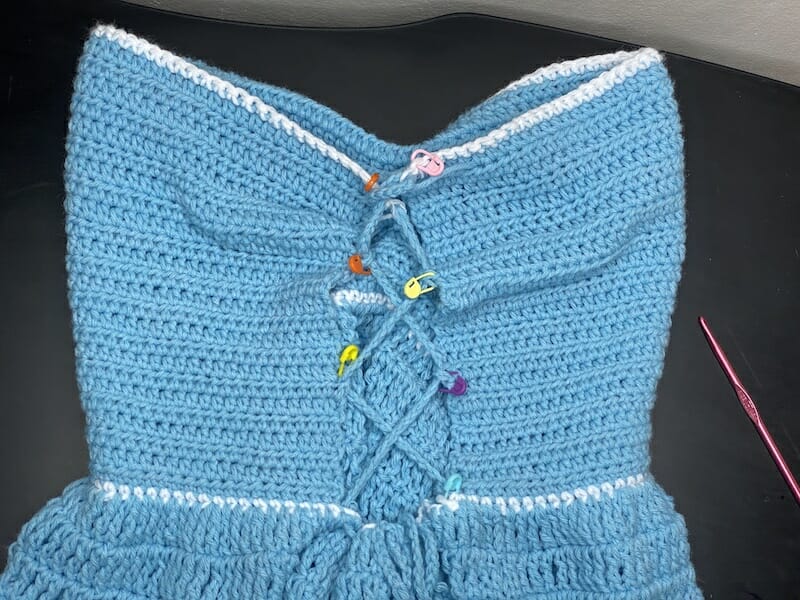
The strap will be laced across the back gap of the top. We are going to weave the strap evenly across both sides of the gap in a criss-cross pattern.
Lay the top down so the back gap of the top is facing up. Place stitch markers on each side of the gap to evenly place your strap along the edge. I used 4 on each side. Insert one end of the strap into the top corner of the gap, and then repeat for the other side. Cross the ends of the straps over each other, and then insert the ends of the straps a few inches down from where we inserted them the first time or where you placed your stitch markers. Repeat the process of crossing the straps over and inserting them into the sides of the gap until the ties end at the bottom of the gap.
Locate the middle of the treble crochets that we put in the chain along the back gap of the top. Take one end of the strap and weave it through the treble crochets that are located in the space on the bottom of the gap. Stop once you reach the middle of these treble crochets. Repeat this with the other end of the strap. Once you have both ends in the middle of the treble crochets, tie them into a bow.
Remove stitch markers and weave in loose ends.
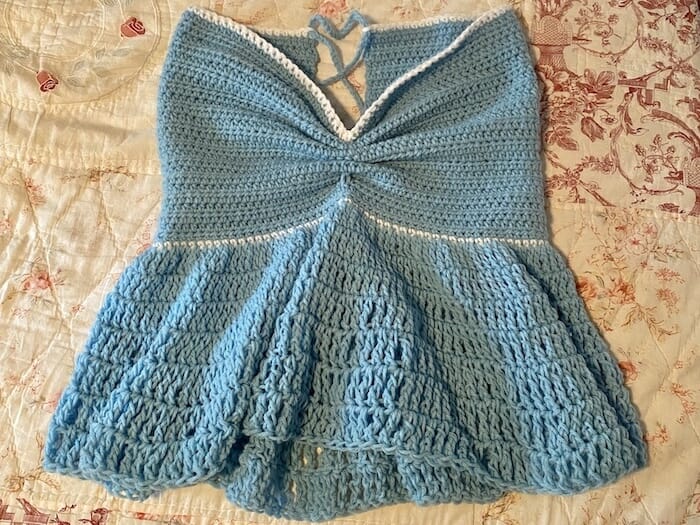
You have now finished creating your top!